
Chai Brew
Automatically Brew an Authentic Masala Chai Latte, a product development build
An authentic cup of masala chai tea will have assam tea with heated milk and a multitude of spices!

Our prototype all completed and working properly!
Initial ideas
The original idea from the sponsors/entrepreneurs that have asked us to create this prototype for them was to have a completely automatic chai latte brewer. In this model, the amount of tea/spices/water/milk were housed within the brewer itself and were automatically dispensed based on dials/settings set by the user.
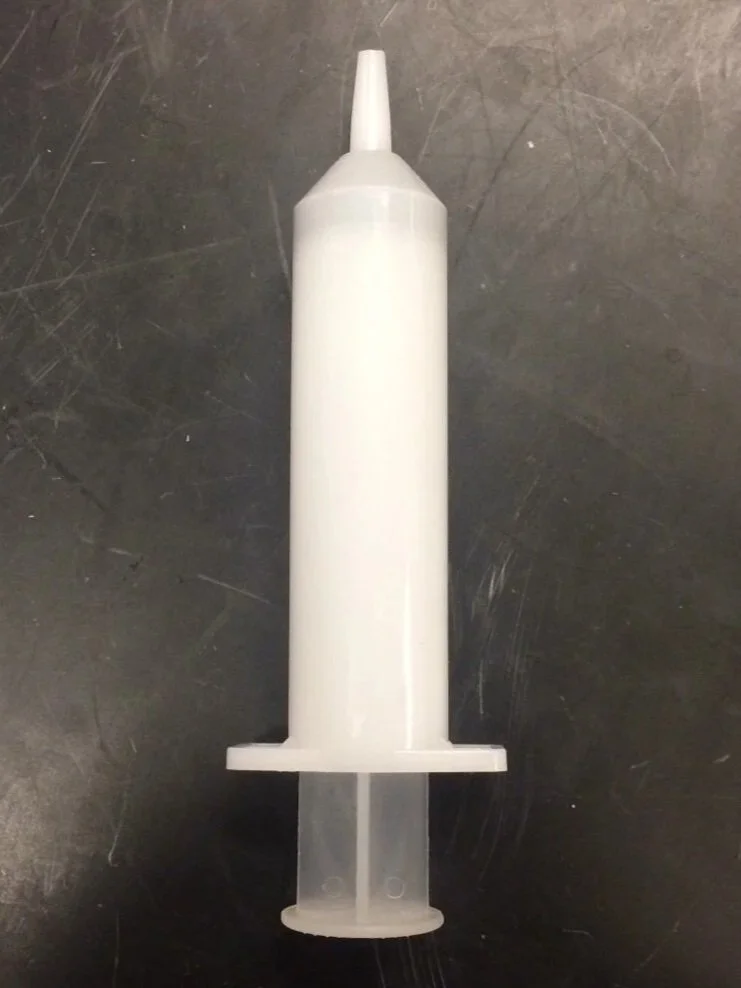
A team before us had made a prototype V1 that was able to do the above but had a multitude of issues such as being hard to clean, non-adjustable to user settings, and having too many moving parts. The brewer itself was a pot similar to the traditional method and one of the biggest pain points was the syringe full of milk. The milk in the syringe and hosing that led to brewer pot would often spoil and be hard to clean.
However, later on, the entrepreneur team adapted the idea to have the user physically put in their desired amounts in then "set it and forget it" until their tea is done.
My role was to look into water/milk dispensing, heating elements, integration, brew times, and food safety codes for appliances. I did all of the physical construction of the prototype so that it was presentable and all moving parts were mounted properly. I also helped with wiring and coding to ensure timing aligned with the best cup of chai. I also did taste comparisons between authentic chai lattes brewed by the sponsors and the lattes that our prototype made. I acted as the project manager and set soft/hard deadlines for the components within the project using gantt charts.


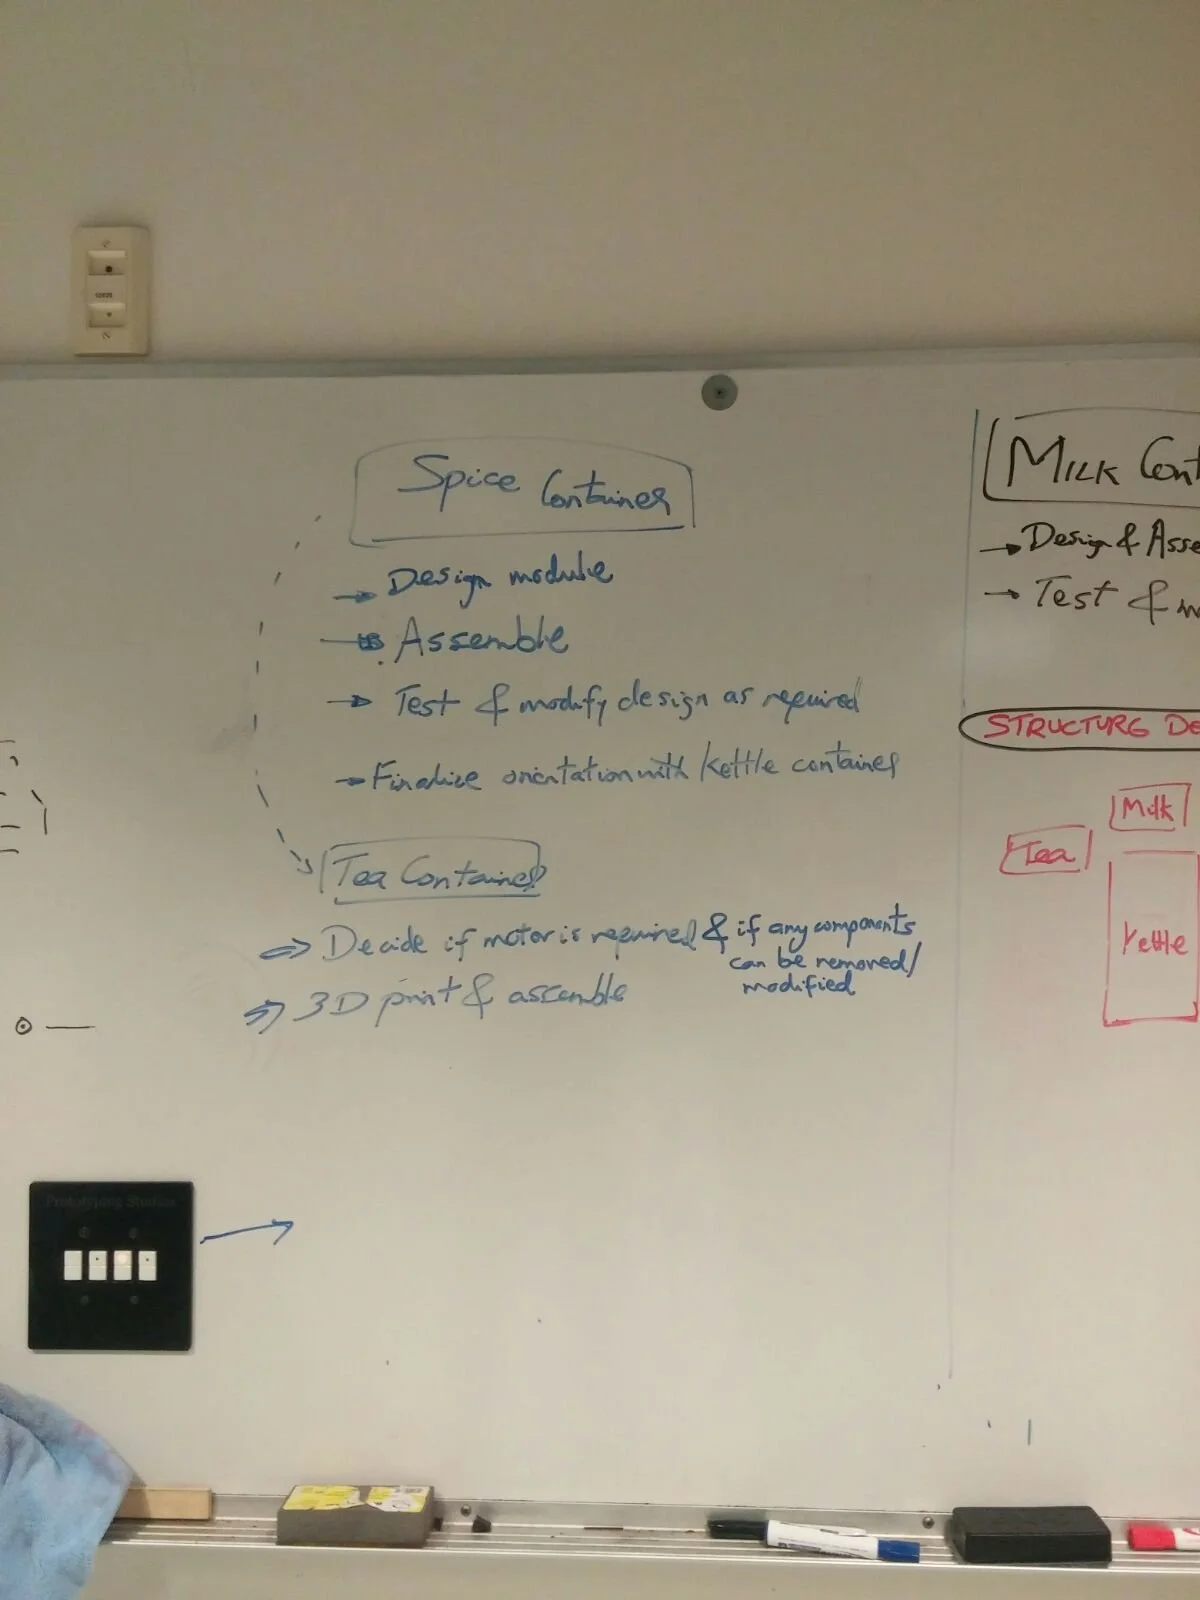

The previous team’s prototype and notes of what they want to improve on in our team’s iteration

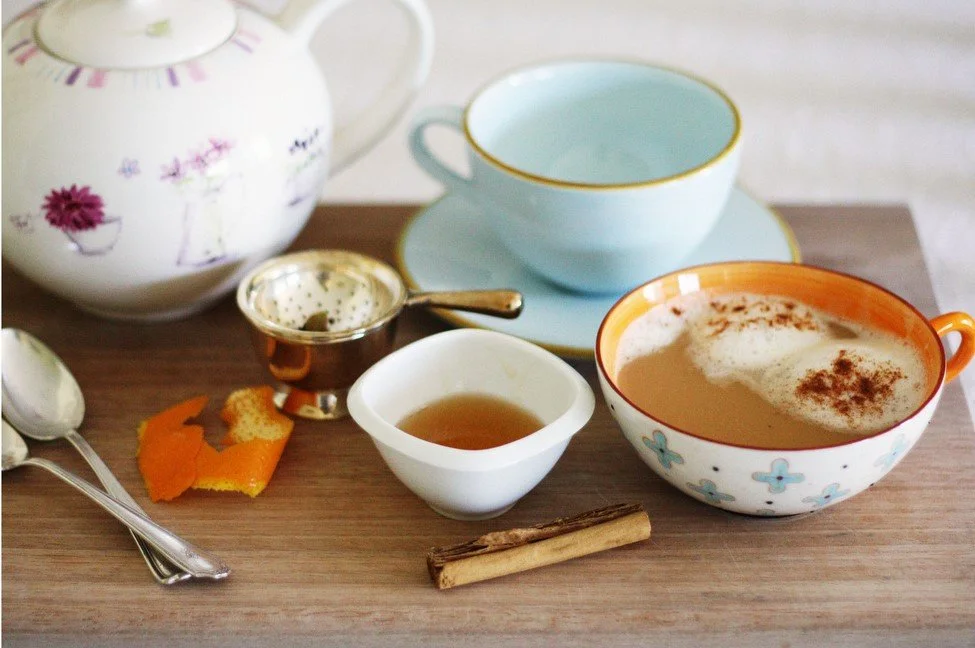
Traditionally brewed chai
Traditional Chai Latte Method
Water and spices is added to a small pot and brought to boil
Tea and milk is added to the pot
The mixture is brought to a boil again so that the tea properly steeps for 2-3 minutes
Mixture is strained into a cup
Ready to be served!
My Role:
I prepared chai the traditional method with good Assam tea so that it could act as our foundation for the flavor that we wanted to achieve. It was a lot of fun to be making good tea in the middle of the night in the engineering labs!
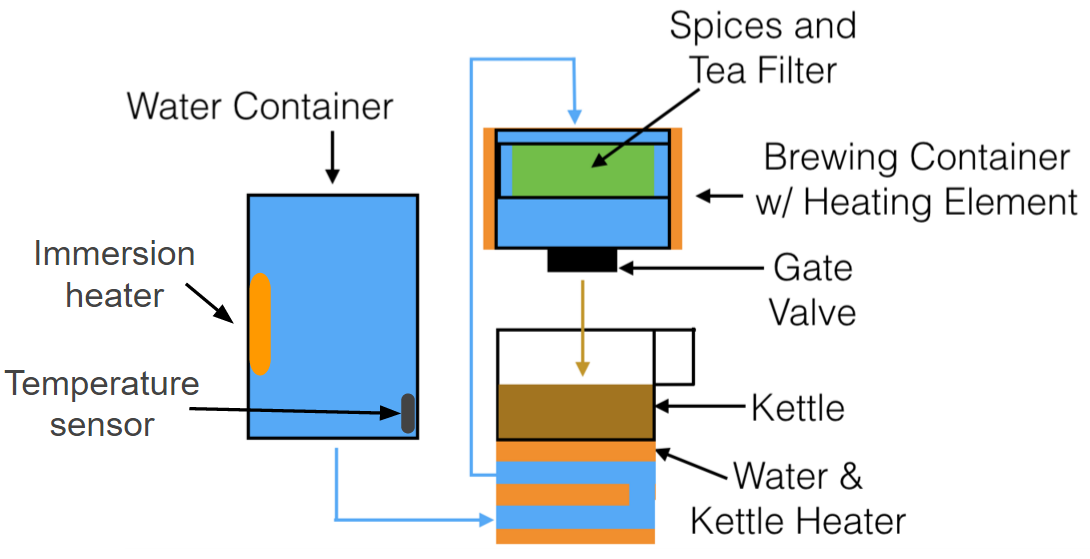

(Top) Diagram depicting major components
(Bottom) Gantt Chart I created to ensure we stayed on schedule
ChaiBrew Machine Method
Water is added to water container
Tea and spices are added to brewing container
Milk is added to glass kettle
When the water is at steeping temperature, it dispenses into the brewing container
Milk is warmed by heater underneath kettle, stir bar continuously stirs milk in kettle
Tea is dispensed after 3 minutes of brewing and strained into the kettle with the warmed milk
Ready to be served!
My Role:
I created this diagram so that we could all agree what our way going forward was. This set of steps is based on a typical drip coffee brewer, a widely available and popularly used method, but adapted to the chai process.
The final prototype put together in one piece
fun fact: the sponsors didn’t say they wanted it in this state until the night before (originally they were okay with the electronic components separated in it’s own box), so I spent all night in the lab reorganizing wires and re mounting all the components to this board I was able to scrounge up, scrappy but they loved the result!
Frame
Adapted from a usual 12-cup drip coffee maker
Stainless steel brewing container replaces plastic brewing basket that usually comes with coffee maker
does not melt when attached to heating pads
Base box
allows space for stirring motor
widened to comply with UL tipping standards (attached brackets to widen base)
Tipping standard: must be able to right itself when leaned to any side at a 45° angle
Following UL-1082
My Role:
I gutted a cheap off the shelf Mr.Coffee brewer and was the one to physically mount all the components onto it and also onto the wooden plank for easy transportation as per the sponsor’s request. This being a prototype, the electronics were displayed for easy access, but the intention was that smaller electronics would eventually be used to easily fit into the next iteration.
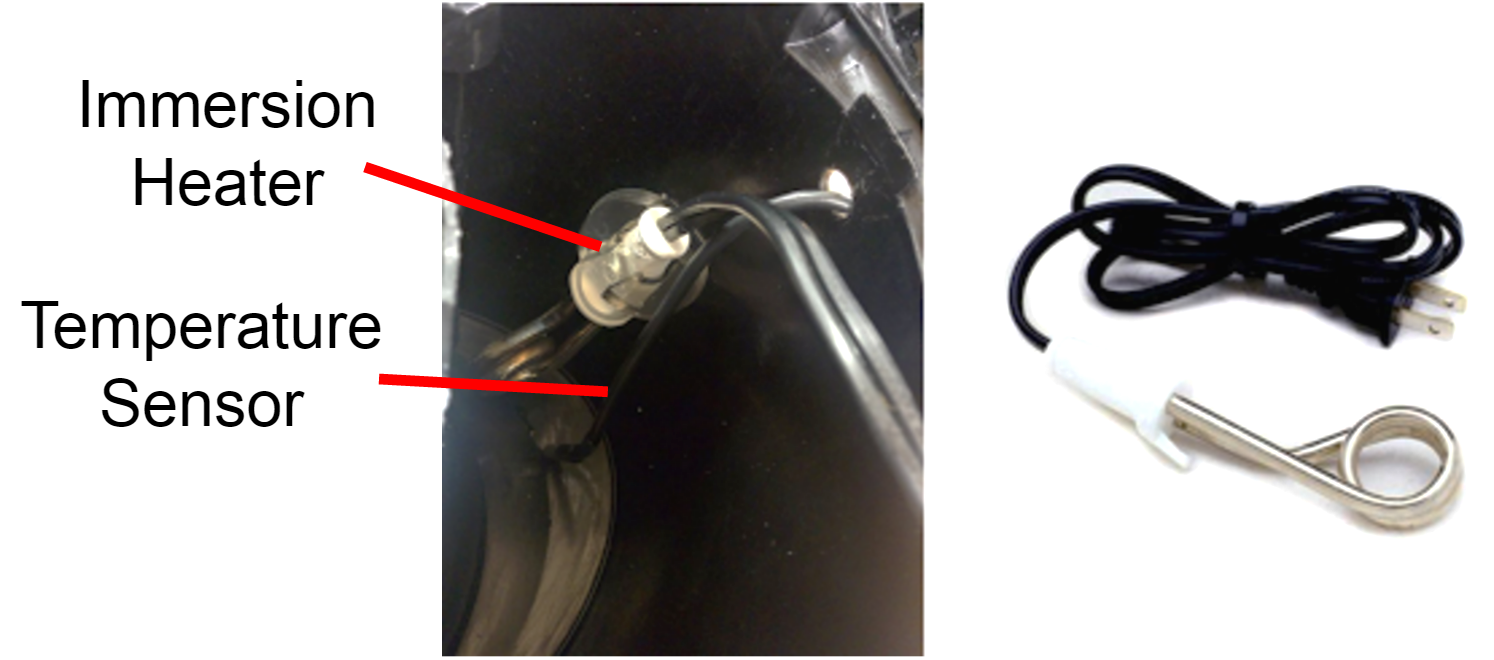


Immersion Heater
preheats water to 70°C so that final steeping temperature can be around 95°C
Flow-through Heater
found in usual coffee makers
heats water to 95°C for brewing container from preheated water
placed below metal plate that kettle is on, therefore simultaneously heats up milk
Heating Pads
surrounds brewing container to maintain steeping temperature of 95°C
turns on before the water is dispensed in so that the container and ingredients are already at temperature and will not lose heat to colder container or ingredients
My Role:
I researched different methods of heating water and sourced all additional components/sensors that we would need to modify the coffee brewer to fit our needs. I used food safe silicone caulking to adhere the heating pads to the steeping/brewing area and drilled holds/modified the plastic body of the brewer as necessary.
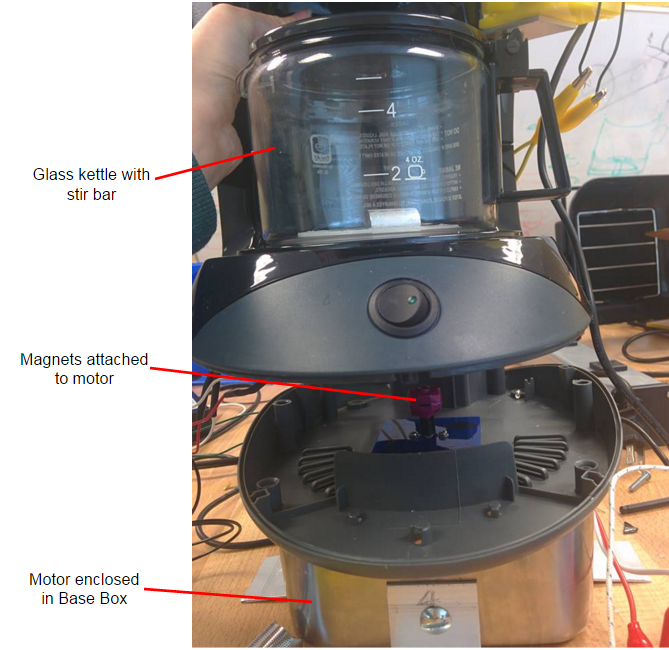

Magnetic Stirring
Prevents milk from boiling over or creating a “skin” on the surface, mixes milk and tea once tea is dispensed; our reverse engineered version because we did not have the budget and could not wait for the ship time for an affordable magnetic stirrer
Motor with magnets
Magnets are attached to rotating rod on motor
attached to the base of the coffee maker frame and resides in the steel base box
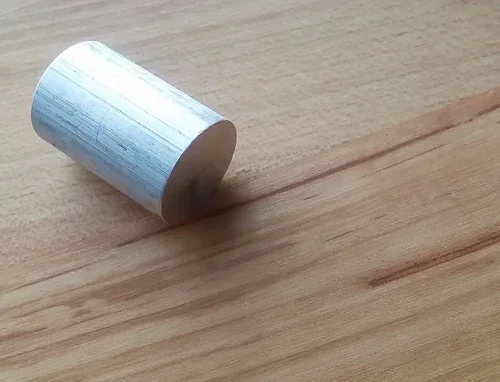
Magnetic stir bar
strong magnets press fitted into a machined aluminum cylinder
Food-grade silicone ring in kettle
prevents stir bar from straying from the middle and being attracted to the ferrous material in the flow-through heater beneath the metal plate
custom molded and adhered to glass
Aluminum plate
replaces steel plate to allow stir bar to move and not just stick to the plate
My Role:
I press fit the magnets into a hollowed aluminum cylinder that my groupmate machined. I molded a ring with our remaining food grade silicone. I created the base box and motor mounts for the magnetized motor beneath the stir plate.

Valve Opener
Solenoid connected to metal arm
12 volt solenoid
controlled through a MOSFET and Arduino
Presses onto valve after steeping time of 3 min to dispense tea
Prevents over steeping
Valve taken from original coffee maker
My Role:
I mounted the metal arm and solenoid on the 3D printed mount that my groupmates had made. I thoroughly tested to ensure that it triggered properly after the 3 minute steep time.
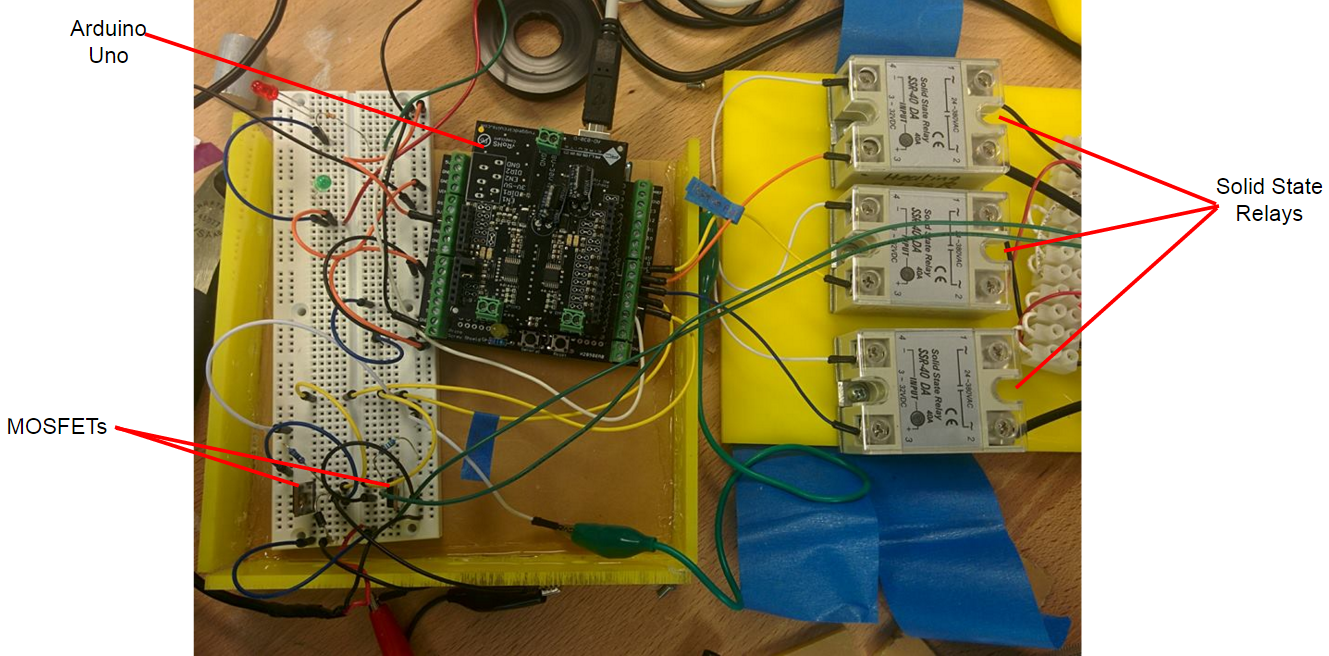


Electronic Components
Three solid state relays
all heaters connected to relays so that they can be controlled by arduino
larger than needed relays were used because they shipped within our time constraints
Arduino Uno
controls all three heaters, stirring motor, and solenoid
MOSFETs
allows control of solenoid and motor through arduino
50㏀ Resistor
ensures that even though there may be spikes in voltage, motor and solenoid do not erratically turn on
Controls/Code
Closed Loop Control
Temperature sensor to turn on flow-through heater after temperature in water container hits 70°C
Immersion heater turns off after
Open Loop Control
Time-based control for heating pads and solenoid
Always on
Magnetic stirrer is constantly on when switch on coffee maker is pushed
My Role:
I wired the relays and the MOSFETs to the breadboard. I created the wire diagram so we could understand and track where each component was wired. I adjusted times in the code that my groupmates wrote so we could effectively test for best steep/brew times.